

My goal with this blog is to fill some of the gaps on documentation within the Business Central community. If you are new to developing in AL, I am glad you are here! Maybe you are a seasoned NAV or BC developer who needs a refresher on how to setup your workstation. In that case, I am happy to help! Overall, this will be a guide of some of the “essentials” for developing in AL for Business Central.
1. Visual Studio Code
To write customizations for Business Central, you will be writing AL code in Visual Studio Code. VS Code is a lightweight development environment that works well with other Microsoft platforms. You can start your install here. Selecting the default options, you should be ready to start configuring your environment.
Visual Studio Code has a vast extension marketplace with several related to AL development. You will need to install the AL Language extension for Microsoft Dynamics 365 Business Central.

This extension is essential because it is what will compile your code. This extensions allows you to enable in-line intellisense (Ctrl + Space), and have access to other commands starting with AL.
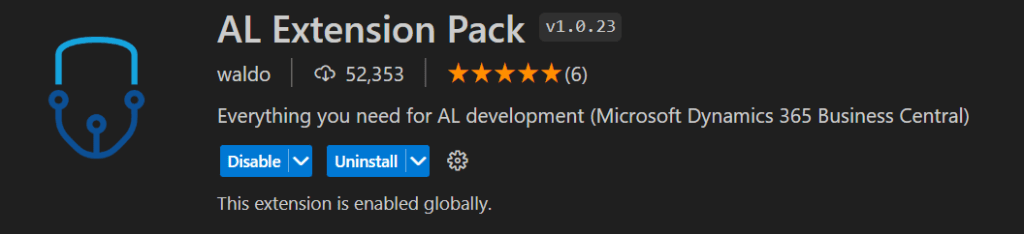
Another “must have” in VS Code is Waldo’s AL Extension Pack. Within this pack are several extensions that many in the BC community find very helpful in development. I have highlighted a few of them below, but check them all out for yourself.
- Waldo’s CRS AL Language Extension: This extension is probably one of the biggest time-savers.
Within user settings you can set properties to help you have consistent naming conventions."CRS.ObjectNamePrefix": "TBM",
"CRS.OnSaveFileAction": "Rename"
These two simple settings will add your prefix to the beginning of your AL Objects, and rename the files when you save them. This extension also includes several different code snippets for creating objects, variables, FieldGroups and TestHandlers, just to name a few.
🦖Hey dinosaurs: did you know about the ttablesetup and tpagesetup? These code snippets create setup tables/pages for you! - AL CodeActions: This gives you a little lightbulb in your code, providing you with actions to speed up your coding. Some of my favorite uses are refactoring code or promoting actions.
- AZ AL Dev Tools/AL Code Outline: This extension is another collection of tools to help you with your AL Development. One of my favorite tools is the “New AL File Wizard”. Right-click within your project folder, and select the menu button. You will be prompted as to what type of object you would like to create, and it walks you through a wizard. Add your object number, object name and if it’s an extension you will be prompted for what you are extending. If it’s a new page what is the source table, and then you can select which fields from the underlying table you would like to be included. You will need to look through the release notes to see what is all included; I learn something new every time I review.
- AL Object ID Ninja: This is a must when you have multiple developers working on the same repository. The 🥷🏼Ninja just sits behind the scenes and suggests the next object number available.
- GitLens and Git History work with your git repository, giving you the best tools to work with source code management without having to leave VS Code.
- Powershell: If you are planning to work with Docker containers (which I address here) it’s really helpful to run your scripts right from VS Code.
If you want to increase your productivity even more, make sure you sign up for GitHub Copilot, and install the extension within VS Code.
2. Git
Git is your source code management. It allows you to track versions of your files, so if you need to go back in time and see what changed, it’s available. You are probably working with other developers, who are working on different features, but you both need to modify the same file. Git allows all of this to happen in a neat, controlled environment. You will need to download Git here. When installing, you will want to install with most of the default options. The installation wizard suggests the Vim editor by default, but unless you are familiar with command-based text editors, I would suggest you select Visual Studio Code as Git’s default editor.

You will also want to configure Git so all of your code will be associated with your name and email address. Within VS Code you will want to open the terminal (Ctrl + J) and type the following:
git config --global user.name "Your Name"
git config --global user.email "name@xyz.com"
If you are new to working with Git, I would suggest reviewing this learning plan to help you become acquainted with Git and VS Code.
3. Report Builder
There are three different types of Report Layouts: RDLC, Word and Excel. As a developer, we tend to customize and build RDLC report layouts. They give us the most control over displaying data in printed/processed reports. You will want to install Microsoft Report Builder. Then when you are working in VS Code you can right-click on an RDLC layout to Open Externally (with Report Builder).
Once you have these installs completed, you really are ready to jump in and start writing AL code! You just need access to a Microsoft Dynamics 365 Business Central Sandbox or a Docker Container with Business Central running in it.
Let me know if you found this blog posthelpful, insightful, or you want to add to the conversation about some of your favorite extensions to work with in VS Code.
#msdyn365bc #businesscentral #bcdevelopment

[…] Central. If you need more information on setting up your development environment, check out this blog post. At this point, we are ready to create our first AL […]
LikeLike