

After writing my last blog post BC23 Rich Text content on Reports I was asked if I would consider doing a small pull request to the Microsoft Learn docs article that details how to use rich text content on RDL report layouts for Business Central. The process itself was pretty easy, so I wanted to share how you too can improve the Business Central documentation and contribute.
The Microsoft Learn documentation (or docs for short) is open-source content, meaning that the wider community is able to contribute to the articles, and overall improve our collective experience working with Business Central. The documentation is housed on GitHub in two separate repositories:
MicrosoftDocs/dynamics365smb-docs is the repository for Business Central functionality. The published documentation can be accessed here.
MicrosoftDocs/dynamics365smb-devitpro-pb is the repository for documentation used by Developers and IT Professionals who are administrators of Business Central. The published documentation can be accessed here.
So how do you contribute?
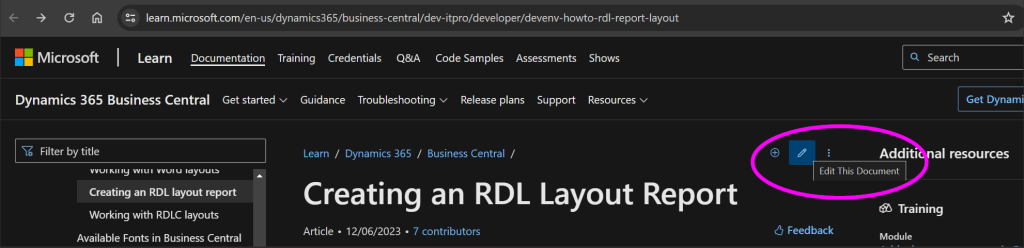
In order to contribute to the documentation you will need a GitHub account This is free, and is is open to anyone. The next step is determining what document you would like to contribute to. Maybe you found a spelling mistake, or something hasn’t been updated for a new release. You will need to navigate to a published document, so I navigated to the existing documentation for RDL Report Layouts for Business Central. You can see to the right of the title of the article is a pencil to Edit This Document.
If you click on it, the doc article is opened as a markdown file. Markup language is used to format plain text documents in a way that is easy to read and to write. Another advantage of Markdown language is that it’s easily converted to HTML, and is then used as content on the internet.
Within your browser the documentation markdown file will open in Preview, which is showing you visually how the markdown will be displayed in the docs.
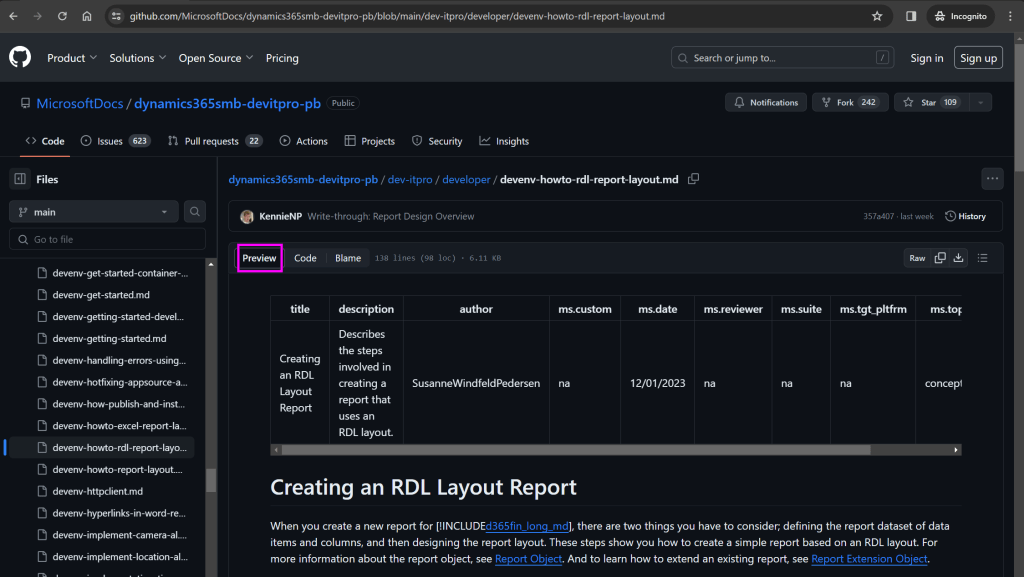
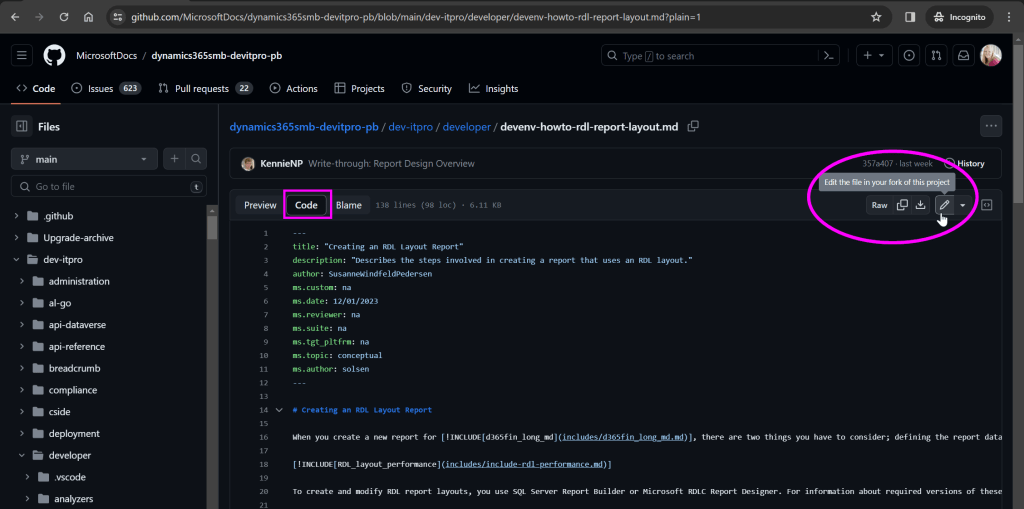
If you click select the Code tab (next to Preview) you can see the actual Markdown code that is used to create the Microsoft Learn documentation.
Making Simple Contributions
I have made changes right within the browser when I have found simple spelling mistakes, or had a small contribution that did not require much formatting. If you are not signed into GitHub, you need to be at this point. Once you are logged into GitHub you can edit this markdown code within your browser by clicking the pencil along the right hand side.
After making your changes, and verifying how it looks by flipping back to the preview, you will click the green Commit Changes button.

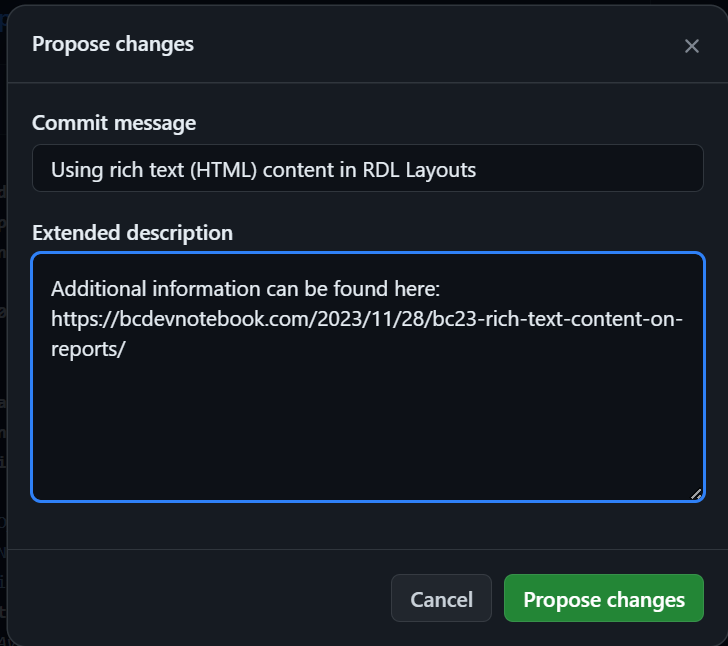
As you can see, your changes will be written to a new branch in your fork of this repository. (if you don’t have an existing fork, one will be made for you.) You will then need to send a pull request to have your changes brought into the documentation. A popup will appear asking you to propose changes. I would put a short description of the change you are proposing in the Commit message, and any other relevant details in the extended description (say there is a link you used to gather the information you are providing).
At this point, you will be ready to create a pull request (which I will address shortly).
Forking the repository to work locally
When I was writing about Using rich text (HTML) content in RDL Layouts I knew I wanted to add some formatting (like numbered lists, highlight code terminology, bullet points, hyperlinks and Notes). So instead of editing within the browser, I decided to fork the repository, and clone to my computer.
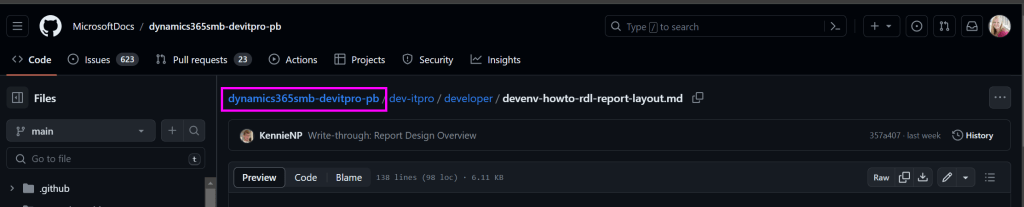
You will need to navigate to the repository GitHub page. The easiest way I found to do this is from the docs page, click the pencil like you are going to edit it. You will then click on the repository name, so either dynamics365smb-docs or dynamics365smb-devitpro-pb
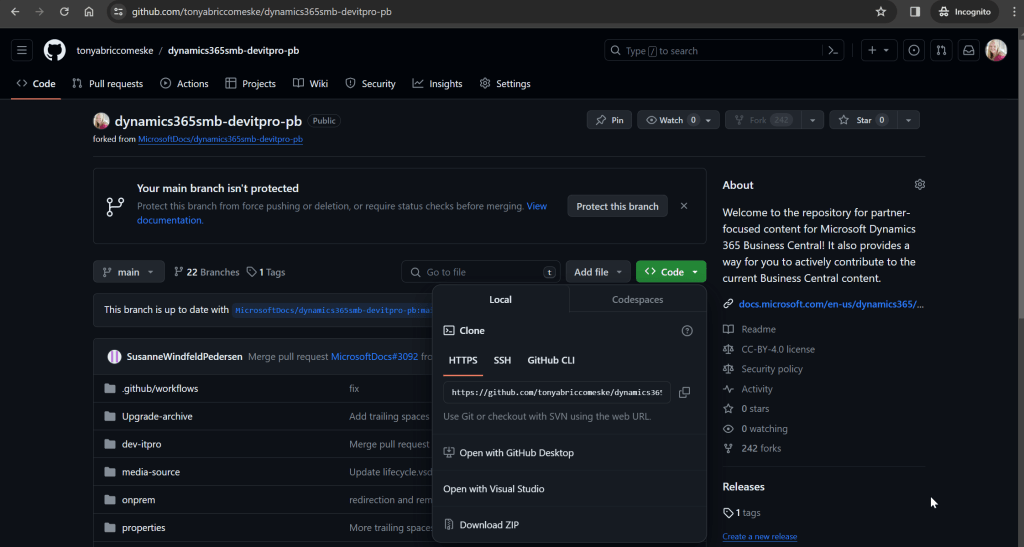
From here, you will click Fork to create your own copy of the repository within your GitHub account. This is required because the real Microsoft repository only has read-only access. Your fork gives you write access in order to make changes and create pull requests to Microsoft.

Note: If you are like me, and made simple changes via the web in the past, your fork will already exist. You should be able to access it by clicking the drop down next to Fork, and navigate to it.
At this point you are ready to clone to your laptop/computer. You will click the green Code button, and now have the ability to clone. The website provides actions to Open with GitHub Desktop, Open with Visual Studio, Download ZIP, or copy the link to your forked repository.
I copied the link, went to Visual Studio Code, and used the command Git: Clone
At this point, choose a location to store the repository on your machine. Once the repository is cloned, you will need to find the individual markup file you need to edit. If we look at the top of the markup page (where we found the link to the repository) we can see where the file is located dynamics365smb-devitpro-pb\dev-itpro\developer\devenv-howto-rdl-report-layout.md
The beauty of having the file local is you are able to leverage developer tools within Visual Studio Code (or any other editor you want to use). A few nice things about using Visual Studio Code:
- As a Business Central developer, I already had it installed
- You can right-click on a markdown file and Open Preview. If you utilize the split-screen functionality (grab an open file and drag it to one side) you can have the markdown file on one side, and the preview on another.

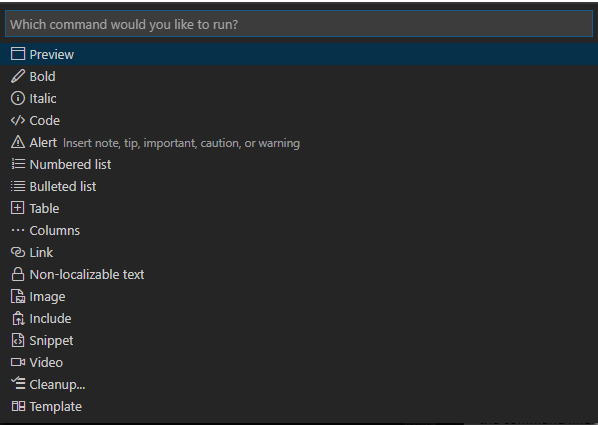
- There is a Docs Authoring Pack for Visual Studio Code that gives you spell checker, Markdown validation, and can quickly help format your text. Highlight the text you would like to format, and use the command
ALT + Mto access the Learn Markdown Authoring menu. From here you can format your text with a variety of commands.
Once you have completed your changes, check them in and push them to GitHub. When you go back to GitHub you will have a message that your branch had recent pushes, and a green button to Compare & pull request will be available. At this point you will be prompted to open a pull request.
Create a pull request
When creating a pull request you will be brought to a page to Compare Changes This will show you visually the changes you have made. You MUST click the green button to Create Pull Request, as this is what will be sent to the docs team for review.
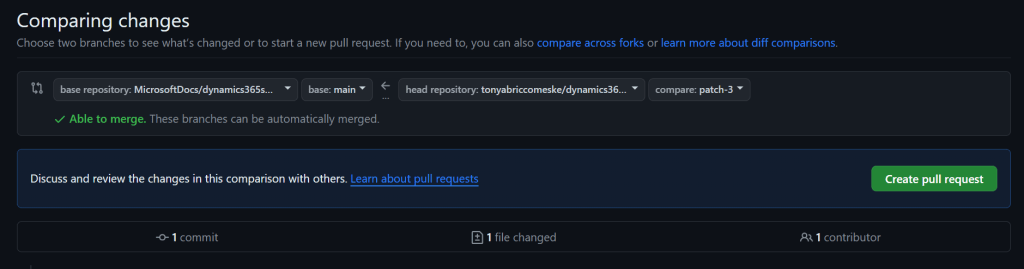
On the next page, GitHub is making sure it will be able to merge your changes. You will need to finally submit your actual pull request by clicking the green Create pull request button. The following screen will update as GitHub does some build verification. I have received some warnings about formatting I applied, or links I was trying to use within the documentation. If you have any questions or concerns, feel free to leave a comment on your pull request, and the Docs team will be more than happy to assist you. Depending on your settings within GitHub, you may also receive email updates on the build process, and get notified when Microsoft is pulling your changes into main 🎉
Overall writing this blog post to document the process was four times as time consuming as actually contributing to the documentation. If you find an issue that you are not sure how it should be written, feel free to open an issue and someone will review it. I actually went through and found a few issues that I knew how to address, and had my changes pulled into main in less than 12 hours. Contributing to the documentation is a rewarding process knowing you are helping others work with Business Central.
📚The following resources may also be beneficial in reviewing if you are interested in contributing to the Microsoft Learn Docs.
Natalie Karolak’s blog post: Contributing to the Business Central Docs
Microsoft Article: Contribute to the Help for Dynamics 365 Business Central
Microsoft Article: Set up a local Git repository for documentation
#msdyn365bc #businesscentral #markdown #documentation
