

When working with RDLC report layouts, there are many different properties available to aide in customization. This blog post will focus on how you can reset page numbers on RDLC reports, specifically when “batch printing” more than one document.
I’m going to utilize Report 5752 “Picking List” as an example. Perhaps the warehouse manager used the pick worksheet to create all of the picks for the day, and would now like to print all of the Picking Lists. We don’t care that there were 100 pieces of paper spit out of the printer, instead we want to know that this pick is on one sheet so we can ensure everything gets picked for this order. If you were to print multiple Picks using the base layout, it would tell you how many sheets of paper were used.

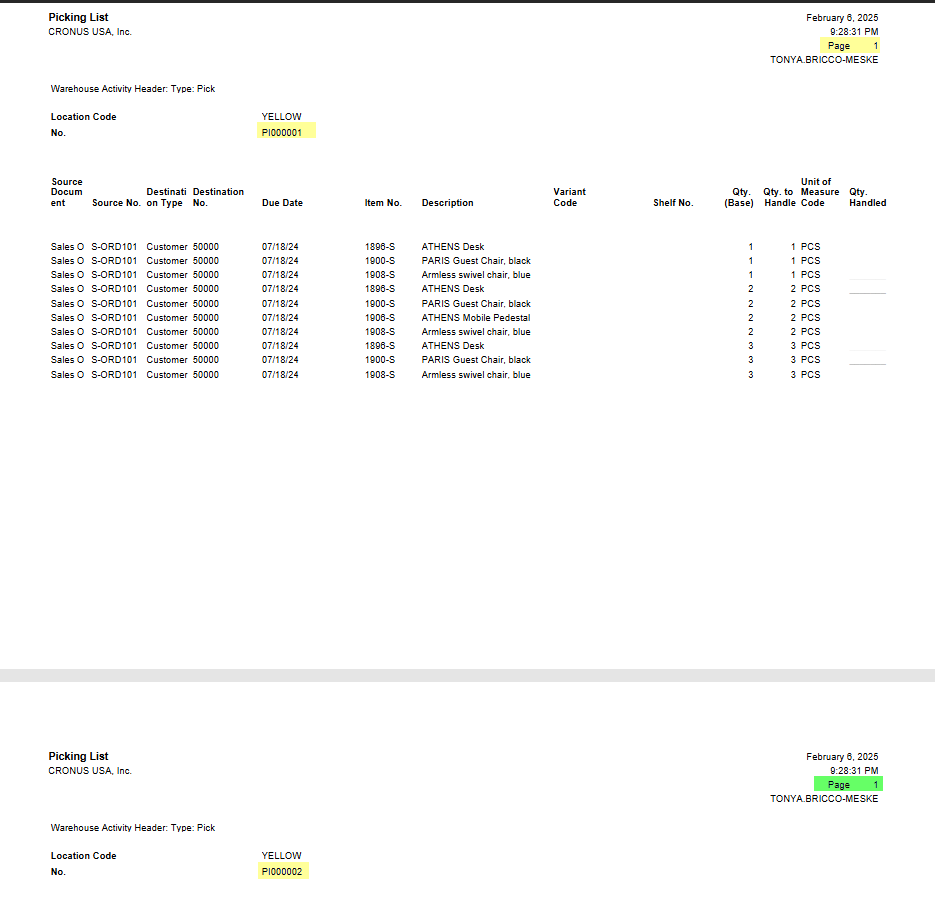
This image shows how the base Picking List works when printing multiple Picks. The page number does not reset with the change of the document.
So how do we reset the page number per “document” (or in this specific instance, for each pick)?
On the RDLC layout, we will want to go to the group that we want to be the deciding factor as to when we should reset page numbers. For the Picking List report, this would be the table2_Group2, that groups on the No_WhseActivHeader (aka the Warehouse Activity Header No.)
When you click on the group, you will see the Tablix Member properties. Within the Group section, you will want to expand the PageBreak section. Here you will want to change the property ResetPageNumber to True.

Report Builder showing how to set ResetPageNumber to true for the selected group.
So now when we print multiple picks, you can see the Page Number resets for each Pick.
You can see a related code sample here
#BusinessCentral #msdyn365bc #HumpDayHacks #reporting
